Linux for Cosmo
Contents
Linux News
11/12/2020 - Linux update
Today we released a new update for Linux users! It can be installed by typing the following commands in a terminal:
sudo apt update
sudo apt upgrade
Please reboot the unit after these commands.
The update includes a brand new feature which allow users to set the keyboard brightness either by using the key combinations Shift+Fn+B and Shift+Fn+N or by setting its value in the settings (System Settings ->Power Management -> Energy Saving -> Keyboard backlight)
The update also contains keyboard improvements and CoDi bug fixes.
18/11/2020 - The latest Linux Debian firmware v3 is now available!
This release contains a Cover Display (CoDi) implementation for Linux which provides a number of new features, such as:
- Mouse Control - you can now use the CoDi display as a trackpad when the unit is open
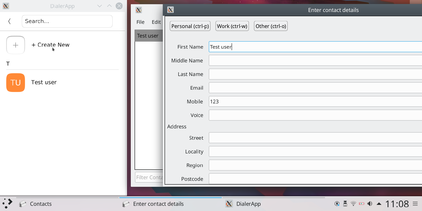
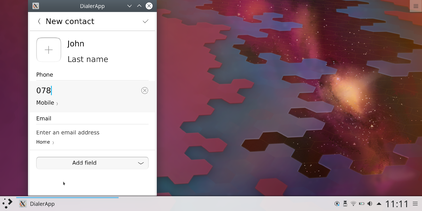
- Phone Control - you can browse contact and place/accept calls from the Codi screen while the unit is closed
- Device Control - you can switch OFF/reboot Cosmo from the CoDi display
- Contacts can be updated by the gka-contacts-qt application or directly from the dialer app
A big thank you to the Cosmo Communicator open source community for supporting Linux on Cosmo Communicator!
To see some of the new features, please take a look at this Cosmo Communicator update video https://youtu.be/aljMVuzT5-Y
Older Linux Debian v2 firmware
The Linux Debian v2 firmware has numerous bug fixes and supports the following new features:
- Phone Calls
- SMS support
- 4G Mobile data support using connman
- Open/Close power save support
Cosmo Linux installation
Existing Linux installations
Before installing Linux, make sure you have the latest Android Firmware installed, currently v25.
If you plan to update your current Linux installation to the latest version, please make sure that you manually install CoDi firmware v15 (Requirement 2 - see below) and follow this link.
The rest of this guide details how to perform a fresh Linux installation.
New Linux Installations
Before starting the installation, please be sure that you are running the latest Android firmware, currently V25 (Requirement 1).
Requirement 1 - Latest Android firmware v25
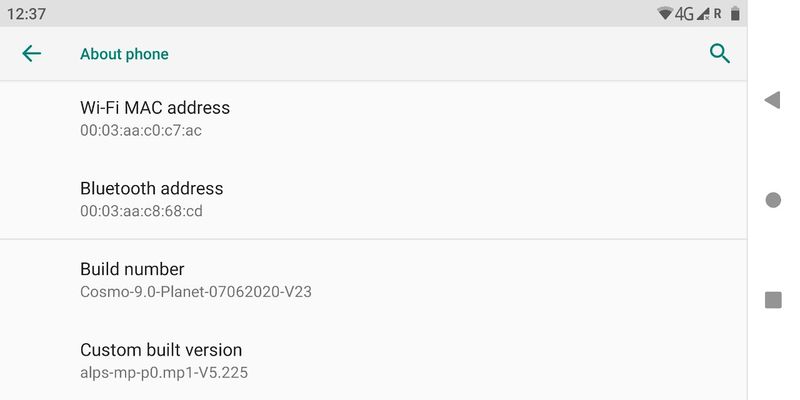
You can check the Android version by tapping Settings -> System -> Advanced -> About Phone and scrolling to the end of the page (see Build number detail, in the screenshot below).
Requirement 2 - Codi firmware v15
Using the latest Android firmware version v25 the Cover Display application will automatically install the latest Codi firmware v15. It is therefore recommended to update the Android firmware and use the Cover Display to install the latest Codi firmware.
For reference, you can find how to manually install Codi v15 using Android v23 here.
Download and Install Linux firmware v3 (latest)
Next, you will have to download the Linux firmware file, which will need to be installed onto the microSD card on your Cosmo. Insert a microSD card on your Cosmo and make sure it is formatted as MS-DOS(FAT32).
The Linux firmware is part of an archive that also contains TWRP and rooted Android.
You can download the latest archive file at this URL:
- http://support.planetcom.co.uk/download/cosmo-customos-installer-v3.zip (MD5: f6a765389913c790174d05dfdcb031d9)
Older versions:
- http://support.planetcom.co.uk/download/cosmo-customos-installer-v2.zip (MD5: ba7f88924eb4254ac4c2aeb1c59ce6d6)
- http://support.planetcom.co.uk/download/cosmo-customos-installer-v1.zip (MD5: 554e8ec1f1c57b0fc3a6140b1ecad3ea)
Alternatively, you can also purchase a Linux Media Installation Card with the firmware already preloaded onto a micro SD card. This can be purchased from https://store.planetcom.co.uk/collections/media-books/
Once you downloaded the zip archive you will have to extract its content onto your microSD card:
- Using the Files app (do not use File Manager app) locate the ZIP archive
- Tap the archive file to reveal the cosmo-customos-installer folder
- Long tap on that folder, select Extract to... and finally select the root folder of the microSD card as destination.
- Complete the ZIP extraction process.
- Your microSD card should now contain a folder named cosmo-customos-installer with several files inside it.
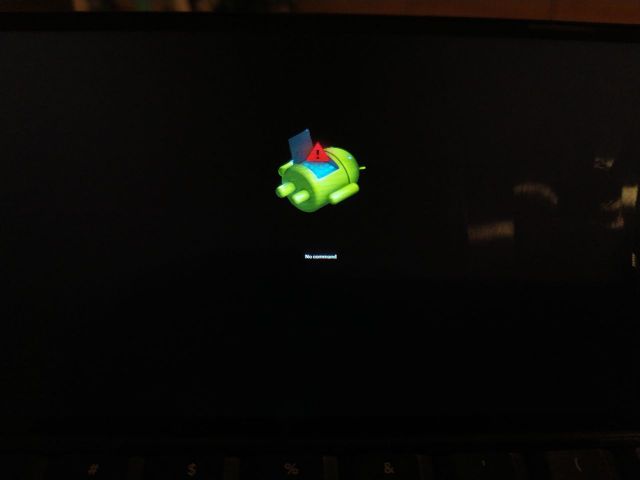
Next, you will have to boot into recovery mode. To do that, simply turn ON your Cosmo while keeping pressed the volume up button on the outside cover. The volume up button is the one on the fingerprint sensor, which points UP when the unit is open. The unit should boot into recovery mode and you should be able to see the Android logo, but nothing else - as in the following screenshot.
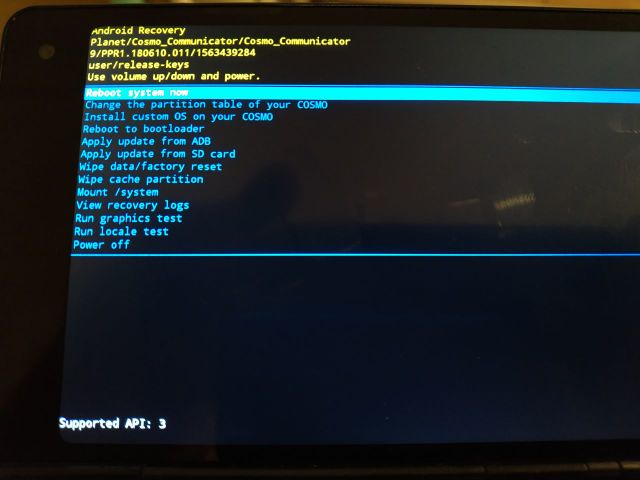
At this point, keep the ESC key pressed (top left key on the keyboard) and press the volume up button from the outside cover again, then release both keys. This following menu will be displayed.
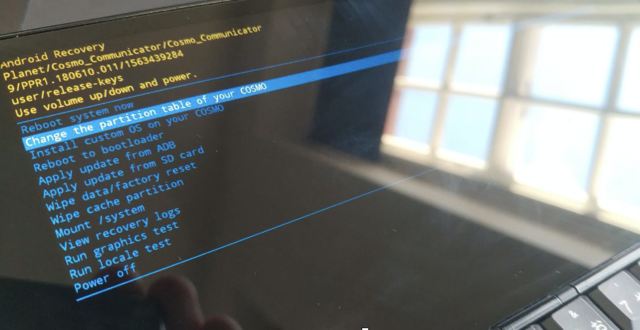
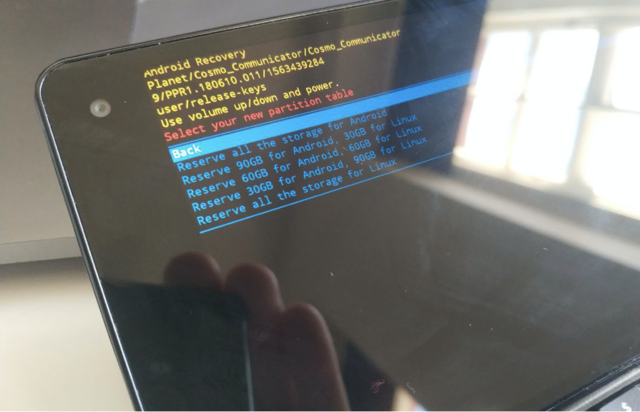
The main requirement when installing Linux is to reserve space for it. In order to do this you will have to re-partition your device, which will lead to the loss of all your data. Once you reserve some space for Linux you can update Android or Linux independently, without loosing your data again. To change the partition table of your Cosmo use the option "Change the partition table of your COSMO", as in the picture below.
You will have 5 options to choose from:
- Reserve all space for Android
- Reserve 90GB for Android and 30GB for Linux
- Reserve 60GB for Android and 60GB for Linux
- Reserve 30GB for Android and 90 GB for Linux
- Reserve all space for Linux
Note that in recent firmwares you will also have the option to keep all the storage for Android while allowing the installation of TWRP and rooted Android, which is useful if you want to have a rooted Android without using Linux.
If you select to install Linux, 4 additional partitions will be created:
- EMPTY_RECOVERY_BOOT_2 - This partition can be used to store an image that runs in recovery mode, such as TWRP
- EMPTY_NORMAL_BOOT_3 - This partition can be used to store Debian/KDE or Rooted Android
- EMPTY_NORMAL_BOOT_4 - This partition can be used to store Debian/KDE or Rooted Android
- In addition, an extra partition will be created with the custom size selected by the user, which will be used to store the root file system.
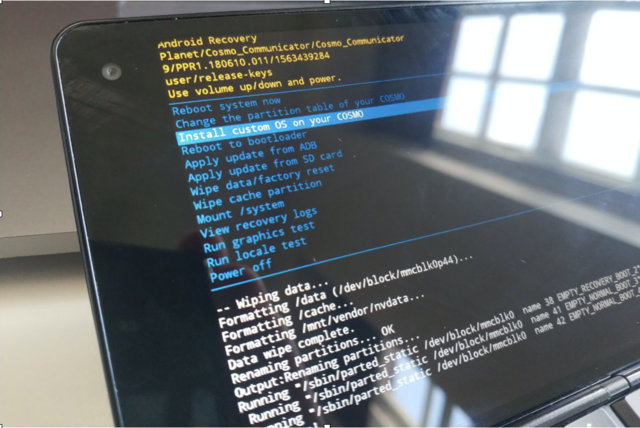
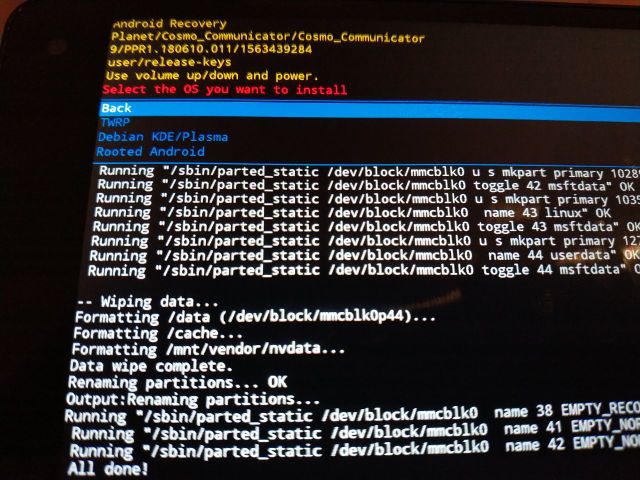
Once the storage for Linux has been reserved, you can install a custom OS on your Cosmo, by choosing the related option as in the picture below.
This option will scan the microSD card for compatible installers and will present you with a menu showing the available installers as in the picture below.
Whenever new or updated custom operating systems will be available for the Cosmo, you will be able to download them into a micro SD card and install it in your device.
At the moment we have initial support for the following:
- TWRP (Team Win Recovery Project) Please use caution when using TWRP as it can brick your device.TWRP support is limited for Cosmo Communicator (you can't access the encrypted user data partition) and its usage is discouraged. Use it at your own risk.
- Debian using KDE/Plasma - beta
- Rooted Android
Once you select a custom OS you have to select where to install its boot firmware. Remember that you can install TWRP only on the EMPTY_RECOVERY_BOOT_2 partition, while you can install Debian/KDE and the Rooted android image in either EMPTY_NORMAL_BOOT_3 or EMPTY_NORMAL_BOOT_4 partitions.
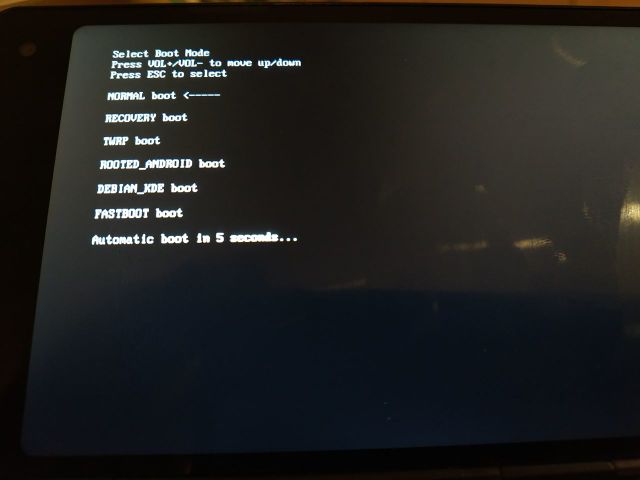
Once you select the boot partition, the custom OS will be installed on your Cosmo Communicator. A boot menu will then appear when you turn ON the device, allowing you to choose what to start as in the following picture.
Using this method you will be able to install a custom OS such as Linux on your device without the need for a laptop or a desktop computer. All you need to do is to download the installer in a micro SD card and use the recovery mode to start the installation.
You can watch a Cosmo Communicator How-To video detailing the Linux installation process from SD card at this address https://youtu.be/7guqI4nA8CU
TWRP installation
Please use caution when using TWRP as it can brick your device.
TWRP support is limited for Cosmo Communicator (you can't access the encrypted user data partition) and its usage is discouraged.
Use it at your own risk.
Follow the installation steps above and just remember that TWRP can only installed in the EMPTY_RECOVERY_BOOT_2 partition.
Debian/KDE installation
Simply follow the installation steps above. The Debian/KDE installer will automatically install the boot image into the selected partition and it will also install the rootfs image into the Linux partition.
Keyboard Layout Configuration
The default keyboard layout is American English, to configure a different layout, see the example command below.
The following command can be used to set the keyboard layout to English (GB):
setxkbmap -model planetcosmo -layout gb
To restore the layout to English (US), use the following command:
setxkbmap -model planetcosmo -layout us
WIFI Configuration
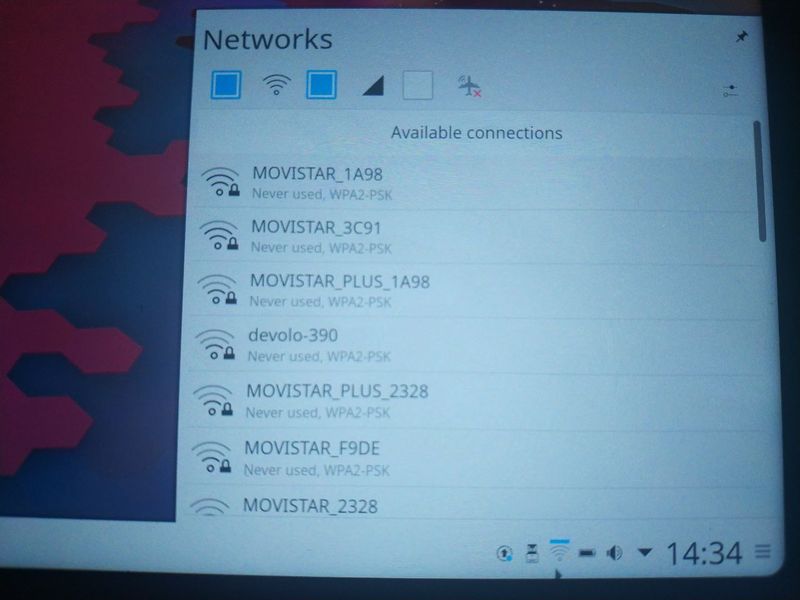
To setup the WIFI connection tap on the NetworkManager icon on the bottom right, select the WIFI network you want to connect to and tap Connect.
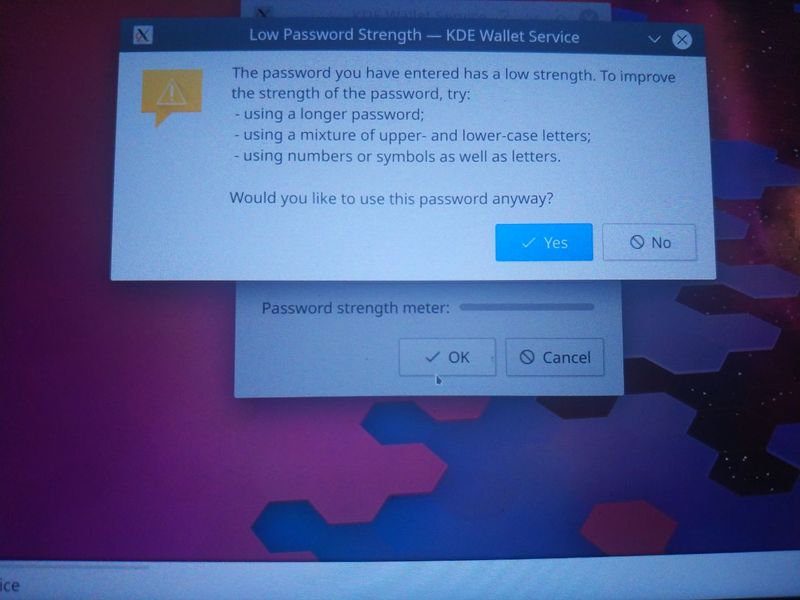
After entering the password, the system will ask you how to store the password. If you want to store it without entering a password, then select the first option "Classic, blowfish encrypted file" and when asked to enter a password just leave it empty and tap OK. The system will then popup a warning that the password has a low strength, just tap on the Yes button.
Phone and Message apps
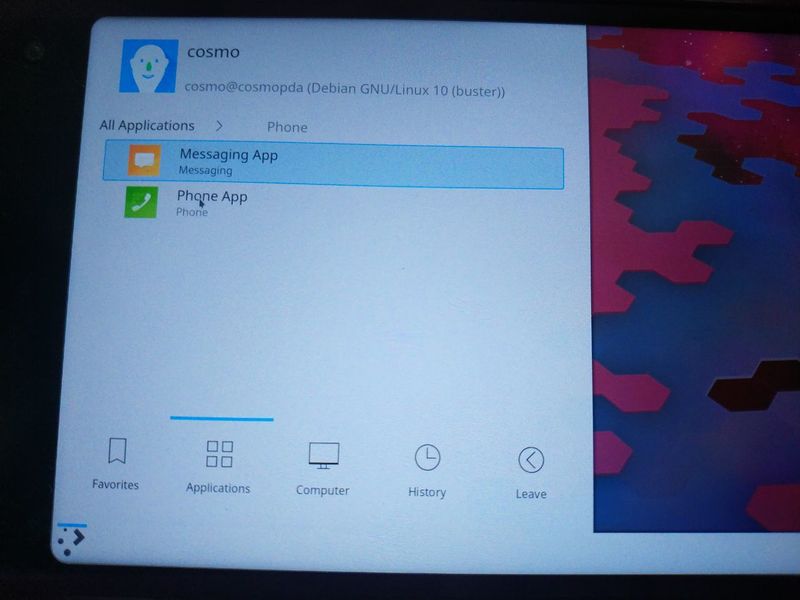
The latest Linux update comes with a phone dialler and an SMS message app. They are available under the Phone application category
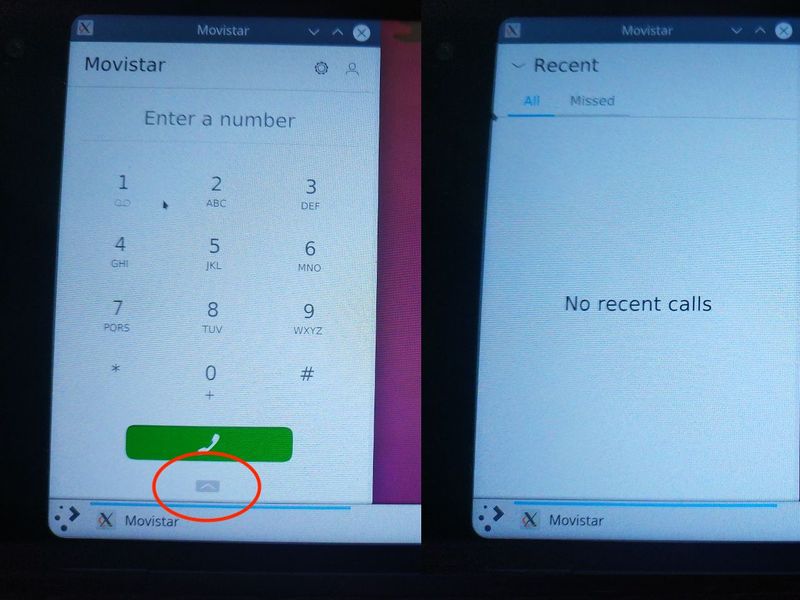
Both applications are quite simple and work as expected. Both apps have a special button at the botton that can be swiped up to reveal more information. For example the Phone Dialler app will show recent and missed calls as in the picture below.
Enbling Mobile Data
Please note that WIFI, Phone calls and SMS work straight away.
The default NetworkManager application also supports mobile data, but it does not work well with Cosmo.
To activate mobile data please follow this link.
Tips
- There is a default user named 'cosmo'. The password for the 'cosmo' user is 'cosmo'
- To update your Linux installation, make sure you configure a WIFI connection and then:
- Become root by typing 'sudo bash' followed by the 'cosmo' password
- type 'apt update'
- type 'apt upgrade'.
- On Linux, the ESC key sends the Escape command on Linux. To send the power command, use Fn+ESC.
Rooted Android installation
Please see this page for instruction on how to install Rooted Android on a Cosmo.
The following information is now outdated and kept as reference only.
Install the Rooted Android image as per the installation above.
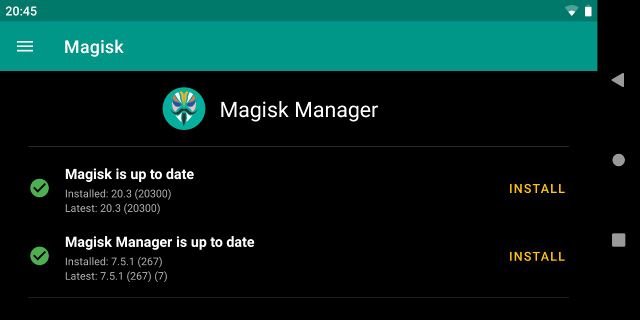
After booting the rooted Android partition, complete the installation by downloading and running Magisk Manager (https://magiskmanager.com). The Magisk Manager interface should then be similar to the following screenshot (notice the green OK icon, device IS rooted).
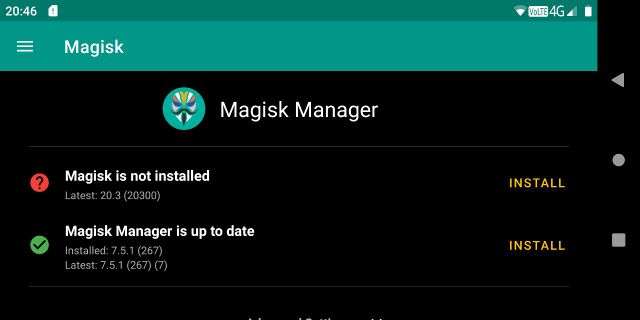
If instead you run Magisk Manager from a normal Android boot (not rooted), it will look like in the following screenshot. The red icon shows that the device is NOT rooted.


